I
apologize for the long break in this blog, but life has a way of intruding. I
had some health issues (am back to full health now) and then my real life
business needed extra attention.
The “Dad’s Shop” project of learning to wire for LEDs is
complete except for installing the porch light and putting on the roof. I hope
you all have enough information to help get through your own projects
successfully.
A couple of shortcuts:
1. I used Aileen’s Tack it Over and
Over, a glue which allows you to attach items in a non-permanent way. This is
important because the LEDs (chips) can last a very long time (10 years), but if
you are like me, you will want to replace them and keep your dollhouse or mini
scene lit for much longer than that.
2. I actually did not do any soldering
on my project. Instead, I slid shrink tube over one end of the connection, then
twisted the wires tightly together and bent the twisted section parallel to the
run of wire. Then I slid the shrink tube over the twisted wires and used a lit
match to carefully heat it until it snugged up over the connection.
3. Where the shrink tubing was
penetrated by the twisted wire, I sealed it with clear silicone. This works
because these wires are never going to be stressed, yanked on or even moved. It
also means that replacing the LEDs someday will be much easier. (I accidentally left a protruding wire which poked through the shrink tube. I'm just illustrating that all things LED are fixable.)
Building the Roombox Contents
Last year’s N.A.M.E. day project, the alcove
(photo from
http://name-carmelindiana.blogspot.com/2011/12/name-day-2012-october-6-7.html )
sat on my shelf for quite a while. I could not think what I wanted to do with
it.

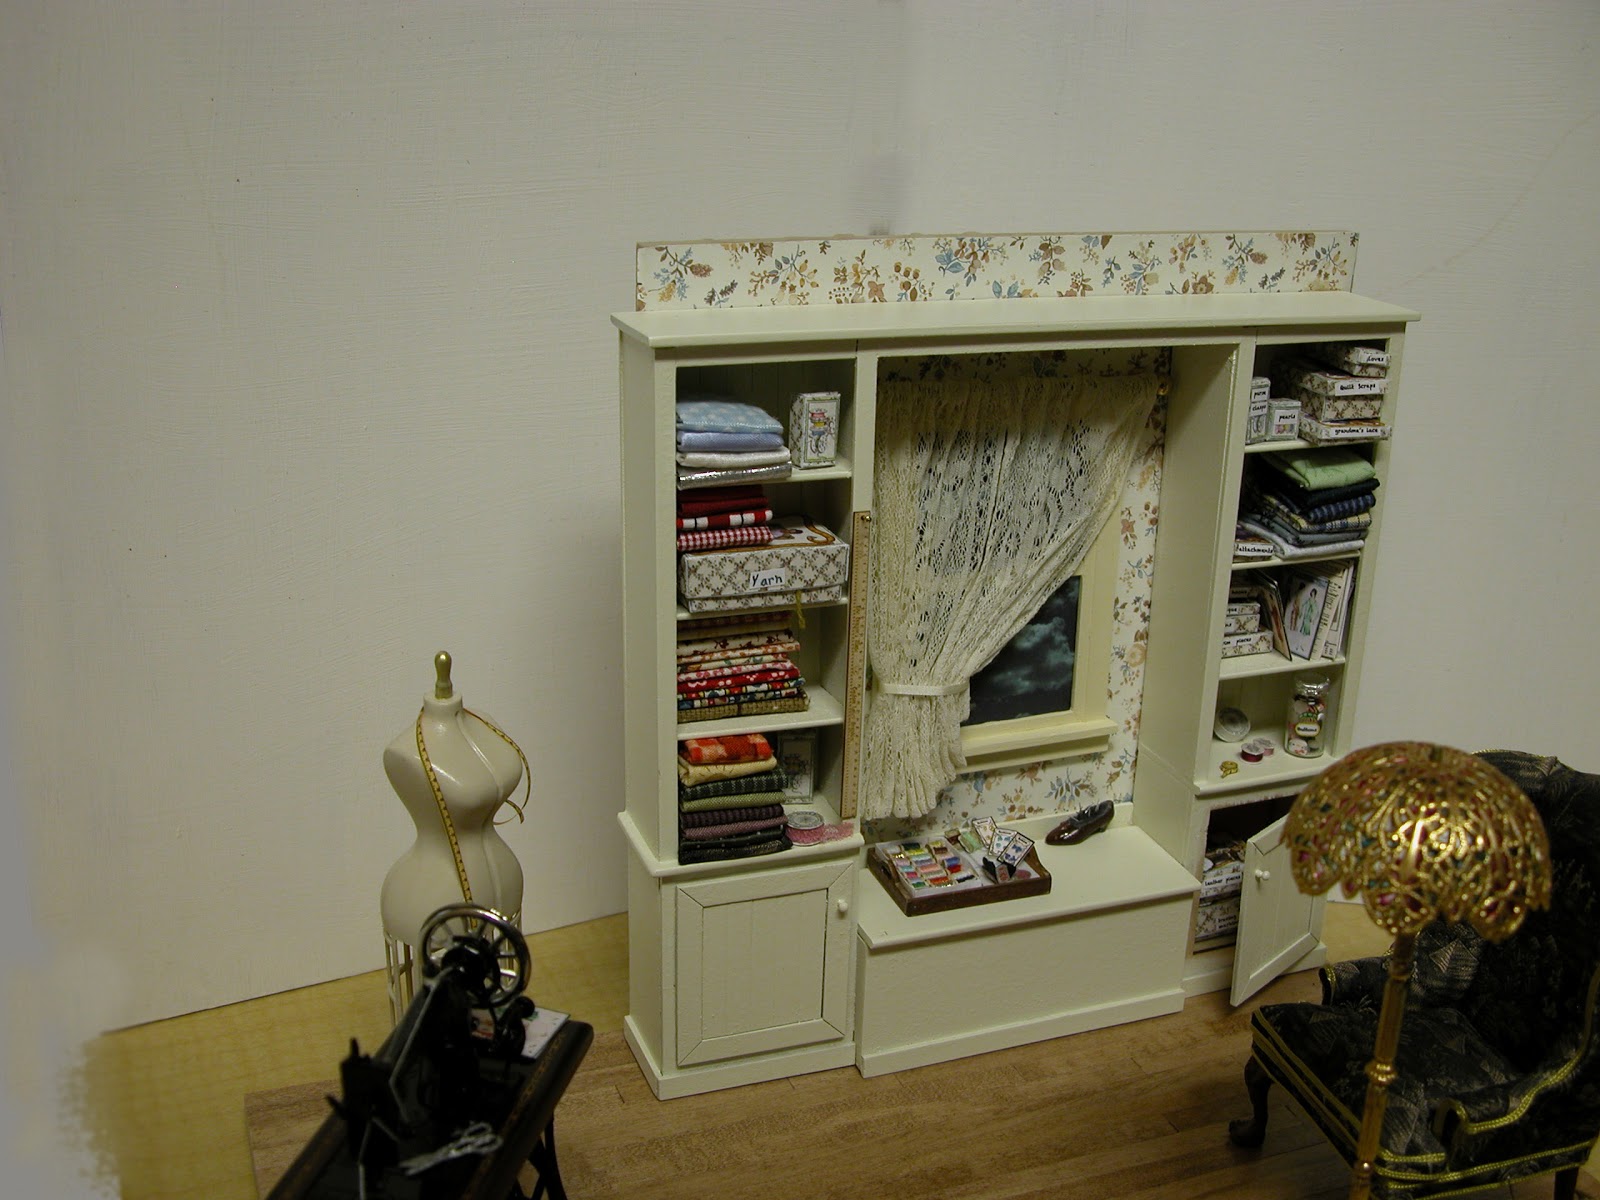
Through a series of events, I decided to use the alcove as part of a sewing room, seen here:
I wired a lamp with one of the nano chips from Evan Design. Its wires are coated with a very tiny insulation colored green and red. The green corresponds to black in DC wiring. I connected the lamp wires to the male end of a pin connector (see below): the red attached to the nano's red wire and black wire attached to the green wire of the nano, so it would eventually fit along the edge of the floor and out a hole in the bottom right back wall.
Next I needed to protect these items inside of a roombox. Time got short, so I did not take pictures as the project proceeded. Later, I deconstructed the roombox to show its parts (see below). However, after securing the box, I painted the inside and then turned it upside down to create a ceiling with holes for lights.
To do this, I cut a piece of white tag board the size of the ceiling and then punched three 1/2" holes in the tag board.
And this is the lovely thing about LED lighting--the diodes can be placed in contact with paper, plastic and other such materials without fear of them catching fire. I made ceiling fixtures from the little 'nubs' that snap plastic strawberry containers closed.
This is not a good photo, but you've all seen the corner of a container. This is a strawberry box with a snap close on each corner. You can only use the top which is rigid. The bottom half of the snap is wimpy.

Cut out the snap and trim it until it is mostly flat, but leave a lip for gluing or taping.

Cut a 1/2" hole in your tagboard (or whatever you are using for ceiling material. This is difficult and you may end up with paper fuzzies inside your circle. I do, so I tack those down using regular hardware store silicone rubber sealant.
 Poke the snap through the hole and either secure it with more silicone or masking tape on the side that will not show.

Now it is time to place the LED as shown in the photo. Secure the LED over the 'fixture' so it will shine through. I used 3 volt LEDs for this project and installed 3 in my sewing room ceiling.

Here is how the underside of the room's ceiling looks with all of the lights in place. You will see that the roombox is upside down and the ceiling is tipped up to show this underside.

Next (below) the ceiling is down and slid into its slot. This picture shows the wires going through the hole in the back top of the roombox.

Below, the roombox is turned right side up and this is how the ceiling looks after three lights were installed.

Lamp wiring
In order to hook up the tiffany lamp, in which I've installed one nano LED, I used a tiny plug, called a pin connector from
Evan Designs. These are tiny 6.7mm connectors. They don't look small because I've taken up a very close-up photo of them. This makes changing lights easy. Simply unplug them.
Below is a picture of the bottom right corner of the bare roombox with the female part (left photo) of the pin connector installed. I've removed the part of the floor that slides in and out for access to wiring. Then I made a tiny hole through the permanent part of the flooring to run wires. This allows me length to "plug in" the lamp when the room is finally all together and yet have the wires remain well hidden behind the right side of the alcove.


Connecting the wires to a battery
Below is a picture of the back of the roombox with all of the red wires PhotoShopped out. You only see the black wires except for the red lead that comes out of the battery holder.

You have three parts to connect: the battery pack black wire (thick wire), the switch black wires, and the black wires of the LEDs.
1. Begin by sliding a shrink tube onto one black switch wire. Hold that black wire with its shrink tube ( the one coming off of the switch) and the three black wires from the ceiling LEDs and the black wire of the lamp's pin connector.
2. Twist all 5 of these wires together tightly. Or you can solder them together.
3. Slide the shrink tube over this connection so all bared wires are completely covered. Now hold a lit match about 1/2" beneath this connection and watch as the shrink tube snugs down over everything.
4. Slide another shrink tube over the other black switch wire. Hold this remaining black switch wire next to the black lead coming out of the battery and firmly twist the two wires together, or solder them.
5. Then slide the shrink tube in place and snug it down with the heat from a match or candle.
Next come the red wires. Again, I have photoshopped out all of the black wires except the leads from the battery box and the two coming from the switch.

1. Slide a piece of shrink tube over the red lead coming off of the battery holder.
2. Gather together all of the other red leads and twist them together (or solder them) with the lead from the battery pack.
3. Slide the shrink tube over the twisted connection and use a match or other heat source to snug the tubing down over the connection.
ENJOY YOUR WELL LIT ROOM BOX
Here is my finished room box:

